
Tokyo Photography Private Tour — Light-First Scheduling
A Tokyo photography private tour scheduled around light, not landmarks. This is not a photowalk — it's not the skill-building approach of Aperture Tours or the hidden-spots angle of AND Camera. It's a full 8-hour private day built around when and where the light is right: 5:30am Sensoji before the crowds, precise blue hour positioning, and a guide who understands why you need ten more minutes at a location.
Why Choose This Experience
Light-First. Not Skill-First. Not Hidden-Spots-First.
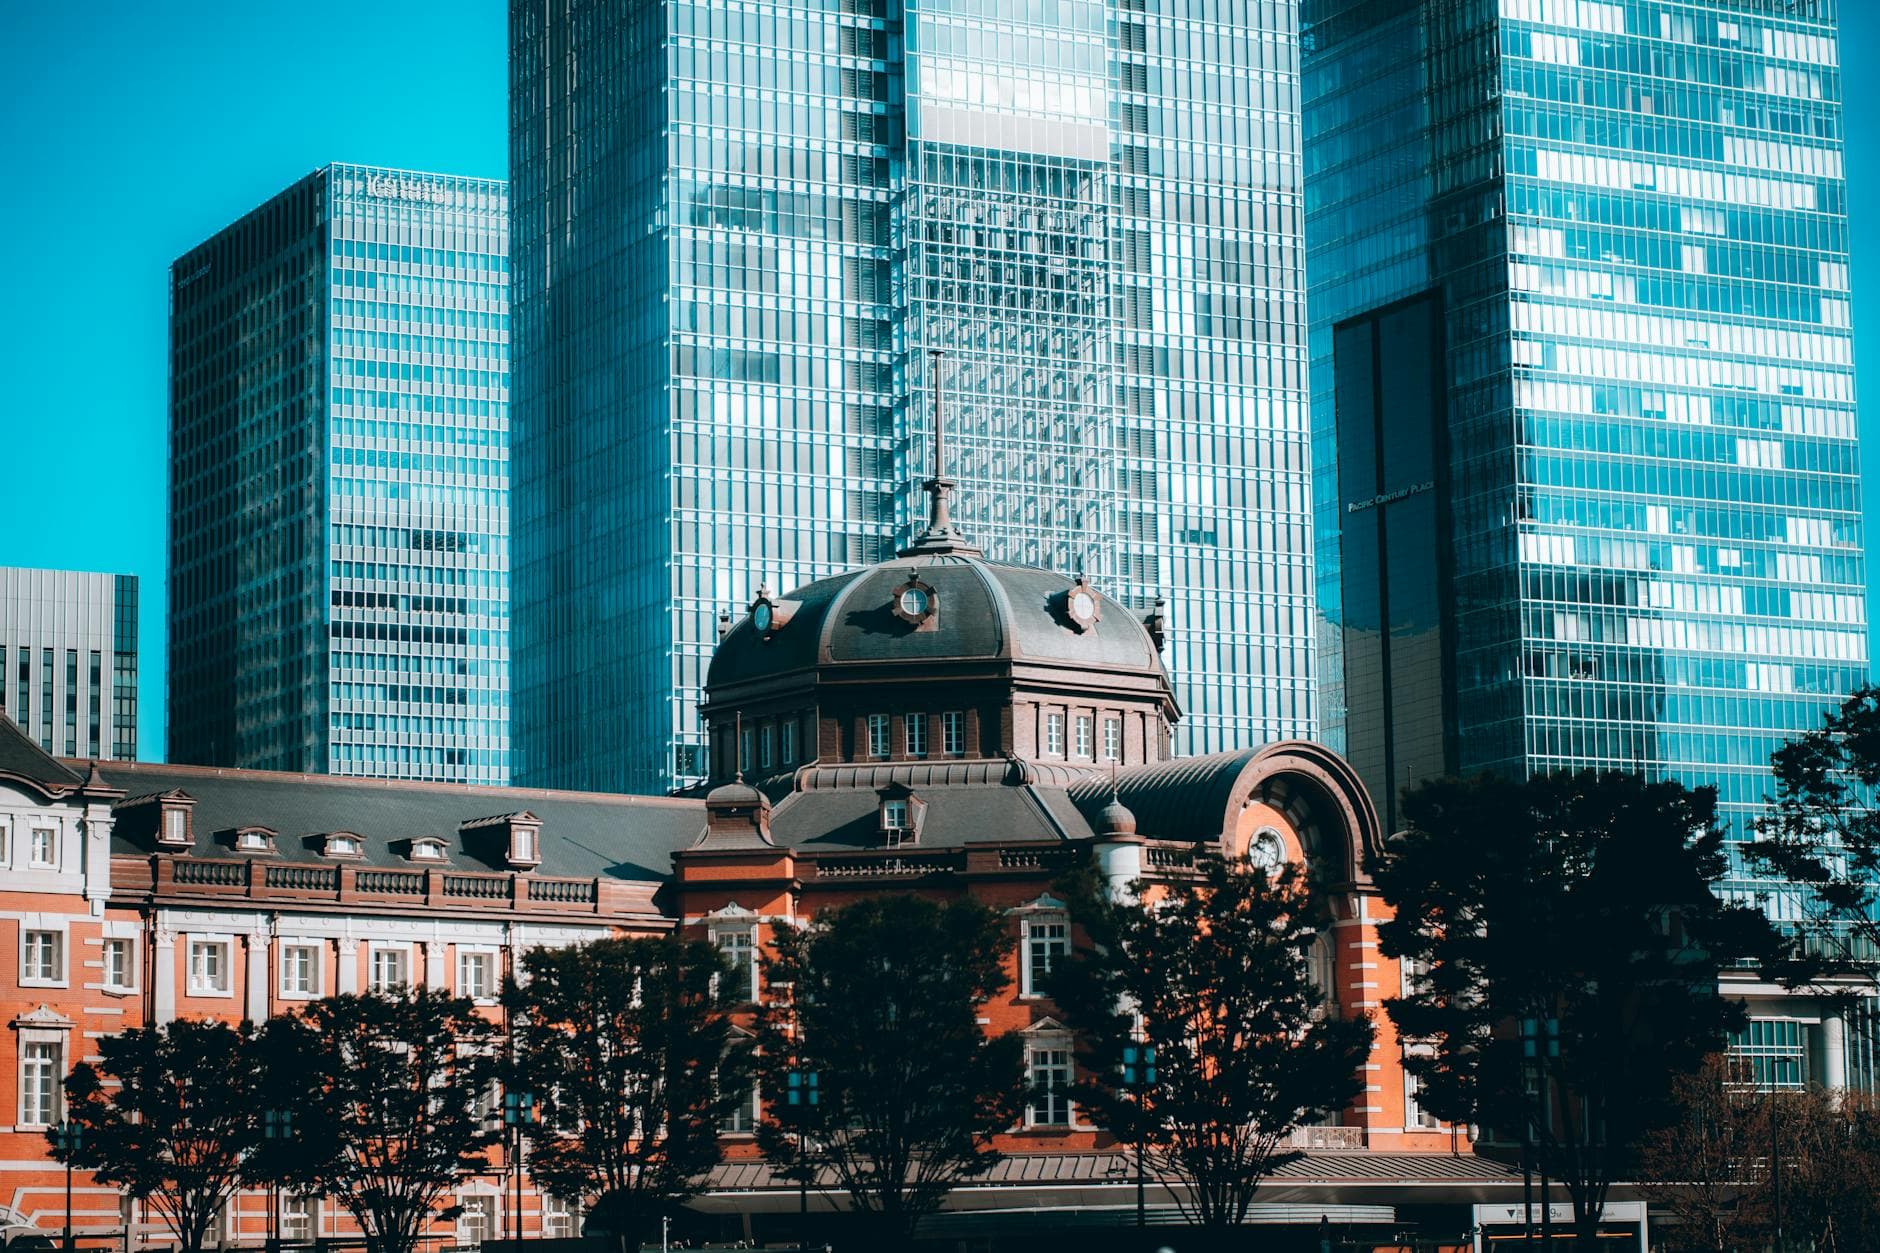
Aperture Tours is skill-first — photographer bios, bundle pricing, technique-focused sessions up to 6 hours. AND Camera is hidden-spots-first — 500k+ social following, 150 five-star reviews, spots no one else knows. Lee Chapman is Showa-era Tokyo — CNN, AP press credits, heritage neighborhoods. Alfie Goodrich is prestige bespoke — Hasselblad ambassador, undisclosed pricing, 20+ years in Tokyo. None of them own timing the way this tour does. Sensoji at 5:30am is a different temple — empty grounds, soft light on the pagoda, two and a half hours of positioning freedom before crowds arrive at eight. Your guide handles pre-dawn taxi logistics, knows that Skytree and Tokyo Tower ban tripods but Yebisu Garden's 38th floor allows them, and calculates that at 35.69 degrees latitude, Tokyo's blue hour lasts twenty minutes after sunset and then it's gone. Full 8 hours. Genuinely private. No package required — unlike InsideJapan Tours, you book directly.
Light-First Scheduling
Aperture Tours structures around skill-building; AND Camera around hidden spots. This tour structures around when the light is right — sunrise, golden hour, blue hour, night — not what's convenient.
Pre-Dawn Logistics
5:30am Sensoji is the window nobody else explicitly owns. Aperture does Asakusa at night; we're there before dawn. Pre-dawn taxi coordination, before crowds turn temple grounds into traffic.
Tripod Access Knowledge
No competitor lists this. Skytree and Tokyo Tower ban tripods. Sunshine 60, Shibuya Sky Level 45, Yebisu Garden 38th floor allow them. Knowing this before you arrive saves the shot.
You Set the Pace
AND Camera does 1.5–2.5hr photowalks. This is a full 8-hour private day. Stand at a location 30 minutes observing light shifts. No group, no hustle, no schedule that prioritizes movement over stillness.
Tokyo Photography Private Tour — Light-First Scheduling Highlights


What Our Guests Say
"I'd been to Tokyo many times before and still had never seen or heard of most everything he included in our tour. We liked it so much, we immediately booked a second day!"
"He took me to hole-in-the-wall spots — a peppercorn specialist in Tsukiji, a Matcha beer spot. We finished at a rooftop foot bath with a beer and an amazing view."
"He took us where the locals go. Hidden spots he knew we'd enjoy, and a quaint yakiniku place with over the top wagyu beef."
"He took us to a little restaurant for 'nibbles and Sake' — three types. Later, an afternoon pastry. Then we finished at a pub for Japanese beer. Above and beyond!"
"Felt like we'd known him for years. Wanted an authentic lunch with no Ramen for a change — a 3rd floor Hot Pot Restaurant we never would have found."
"He made adjustments to the schedule as needed, stayed overtime to see the Skytree, and accommodated picky eaters through his expertise of local food."
"My family wanted anime stuff and everything else jam packed into the day. Satoshi did not disappoint. My family is still raving about this tour days later!"
"I'd been to Tokyo many times before and still had never seen or heard of most everything he included in our tour. We liked it so much, we immediately booked a second day!"
SENSOJI SUNRISE

GOLDEN HOUR

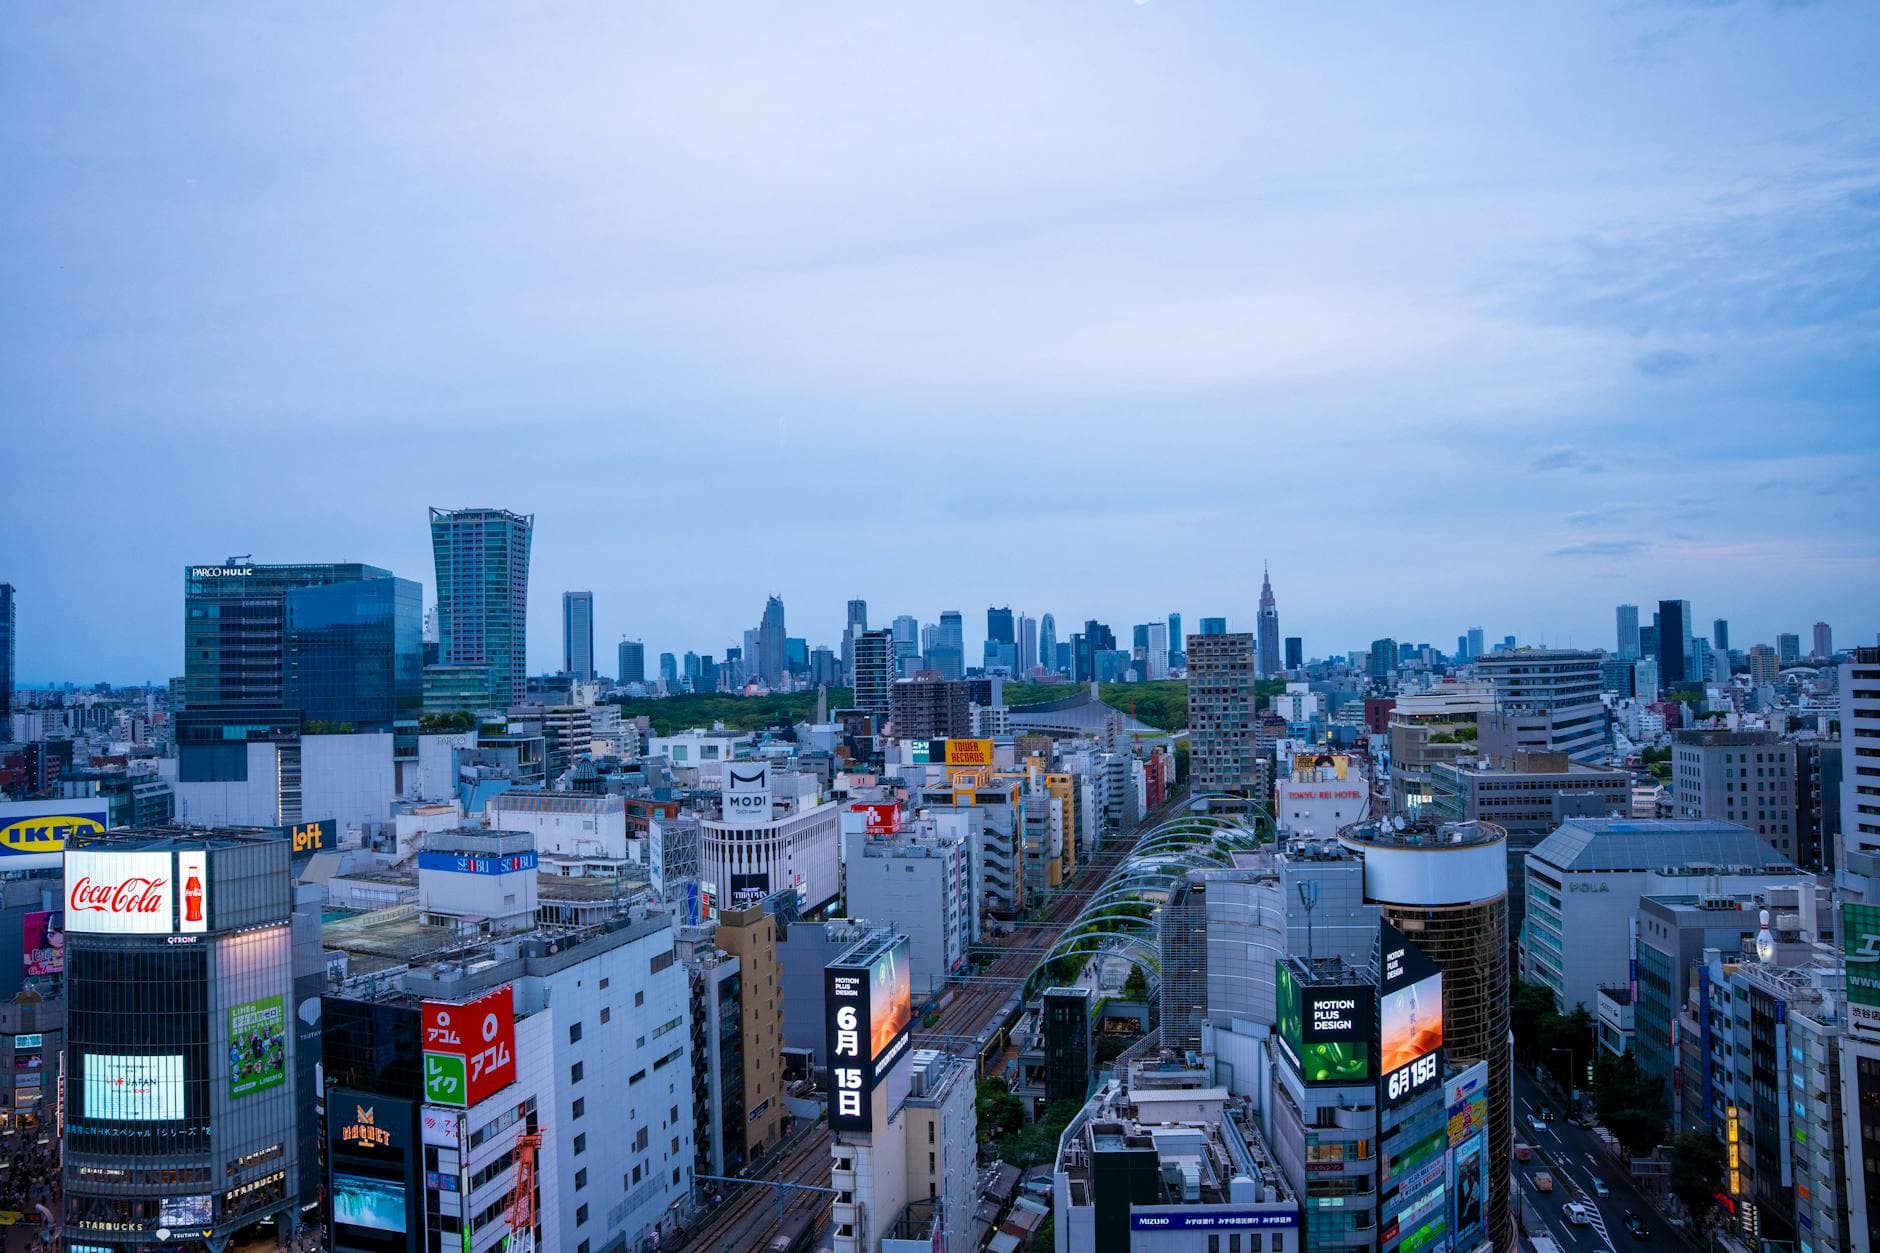
SHIBUYA AT NIGHT
Your Journey
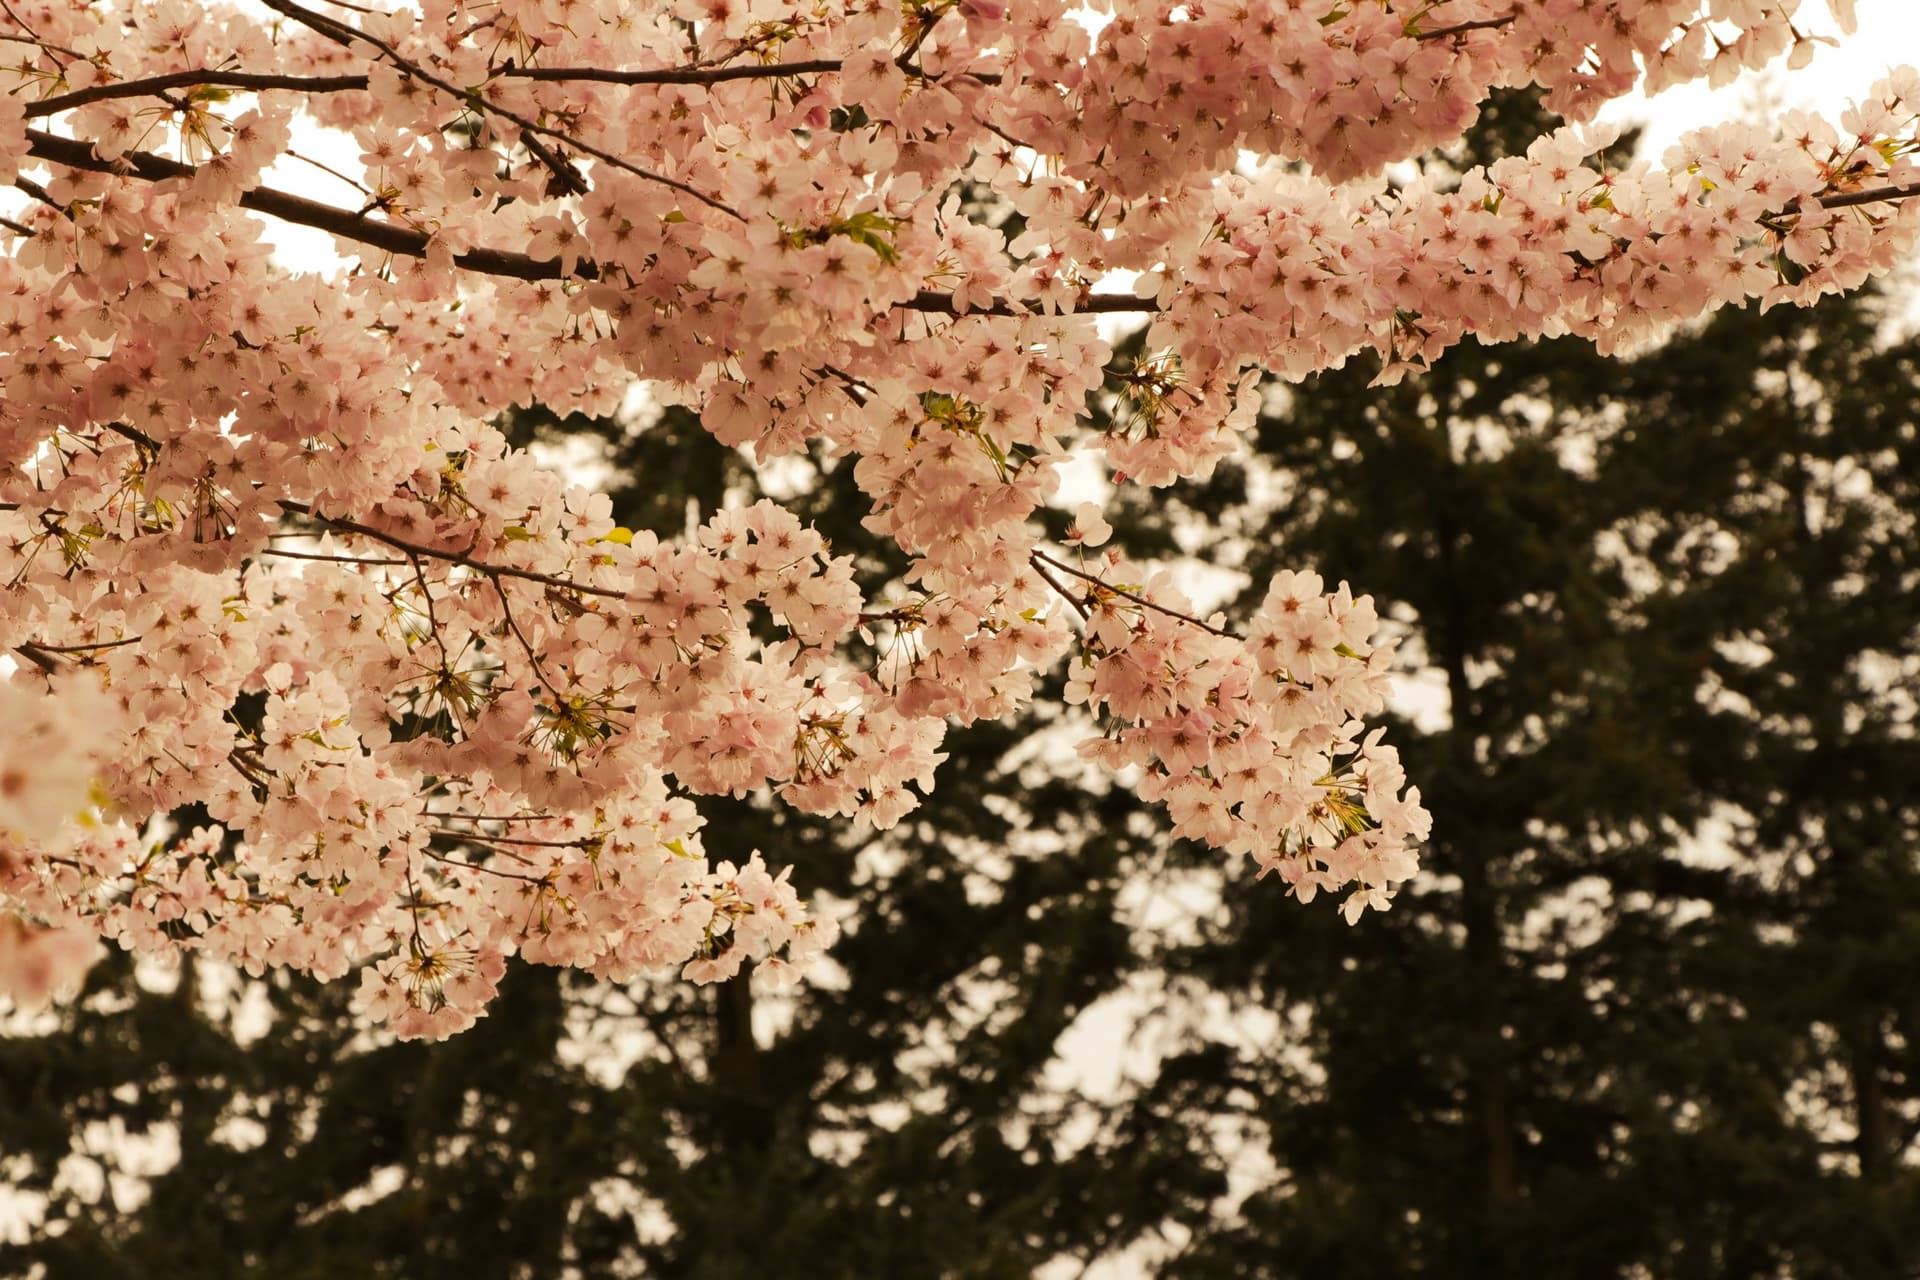
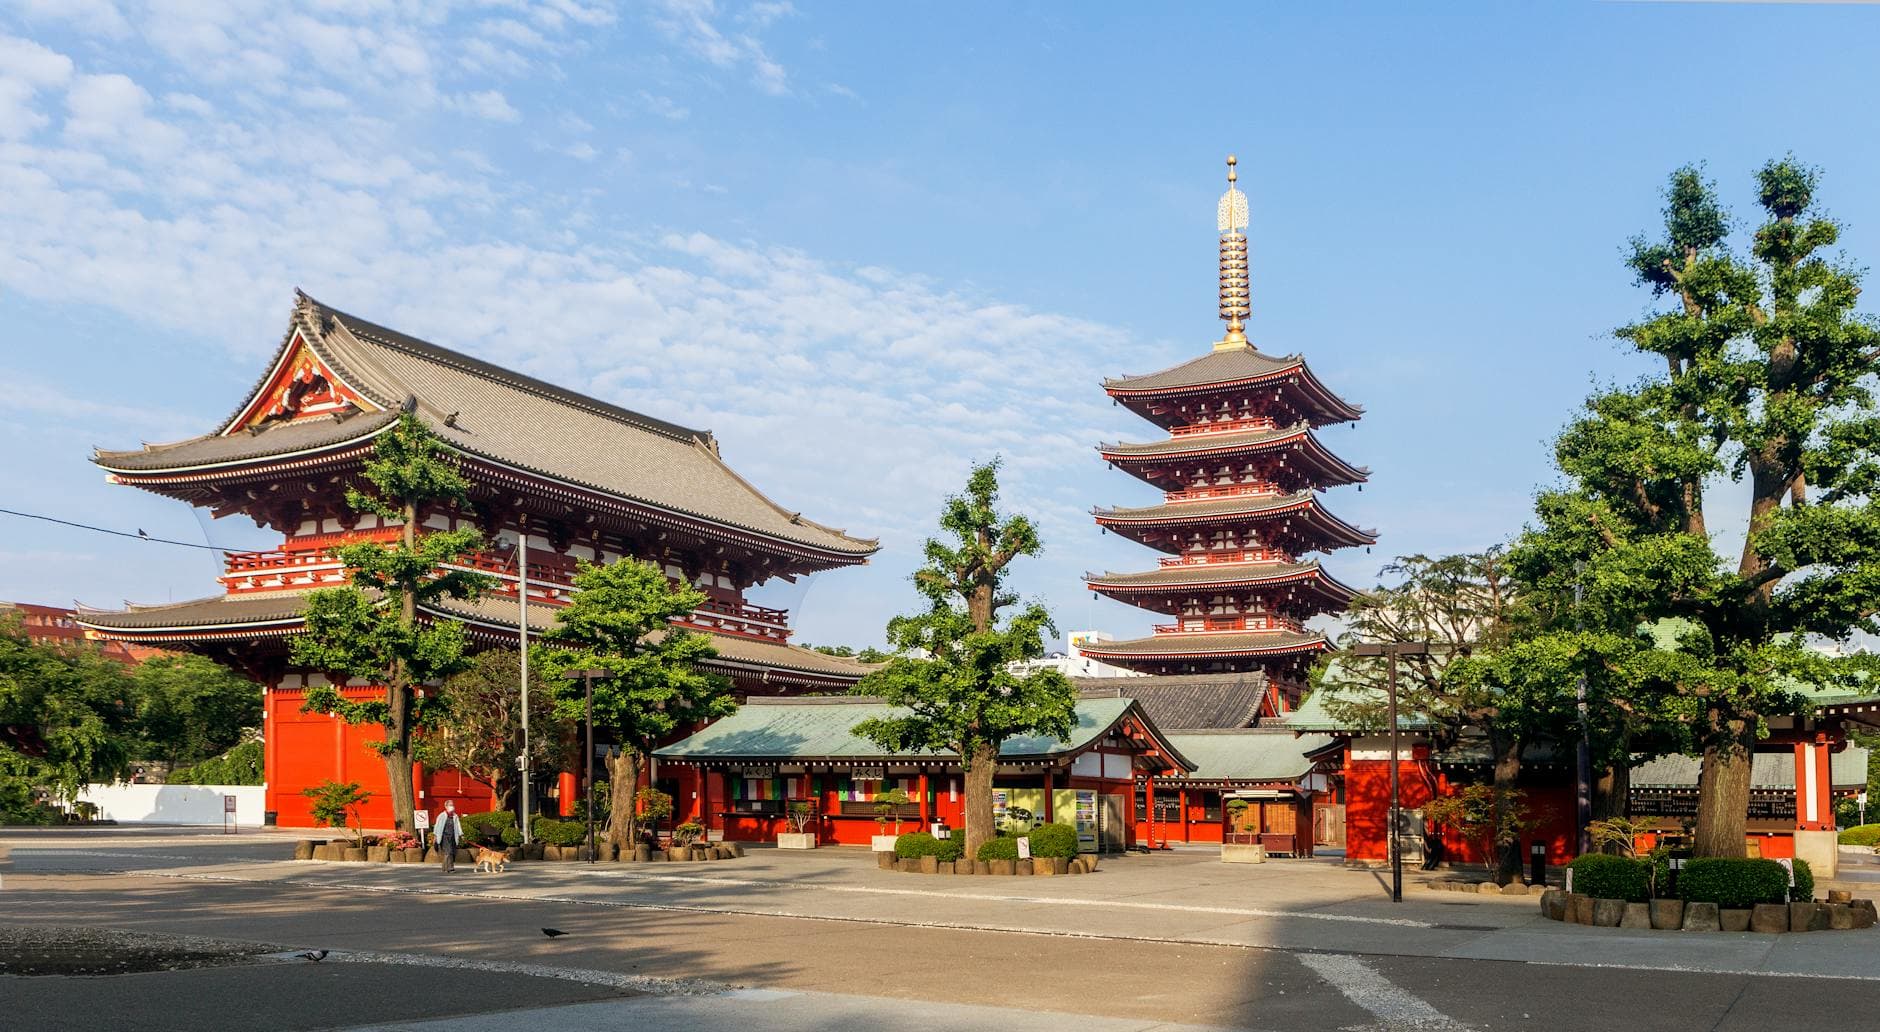
Sensoji Temple Sunrise
Meet 4:45am for pre-dawn taxi to Asakusa (first trains start 4:45am but require transfers). Arrive Sensoji 5:30am when grounds are nearly empty. Soft morning light on five-story pagoda, positioning freedom before 8am crowds arrive. This window is why the day starts before sunrise.
- Pre-dawn taxi Shinjuku to Asakusa ¥3,000-4,000 with 20% late-night surcharge (until 5am)
- GO app allows taxi reservations 15 minutes to 7 days advance—guaranteed pre-dawn pickup
- Sensoji restricts tripods but enforcement inconsistent—discuss with guide based on current policies
Golden Hour & Early Light
Continue shooting morning light at nearby locations—Sumida River views, backstreet alleys with directional light, quiet neighborhoods before daily activity starts. Your guide knows where east-facing facades catch best morning illumination.
- Morning (9-11am) best for east-facing facades and Omotesando luxury flagships
- Photographer pacing: stand 10-20 minutes per location observing light shifts
Strategic Break & Image Review
3-4 hour midday break—not laziness, practical reality. Harsh overhead light creates unflattering shadows for most subjects. Physical reality of carrying gear since before dawn catches up. Rest, meal, image review before afternoon session.
- Exception: glass high-rises diffuse midday light, narrow alleys benefit from overhead sun reaching them
- Cafe or hotel return for actual rest—photography touring is physically demanding
Late Afternoon Positioning
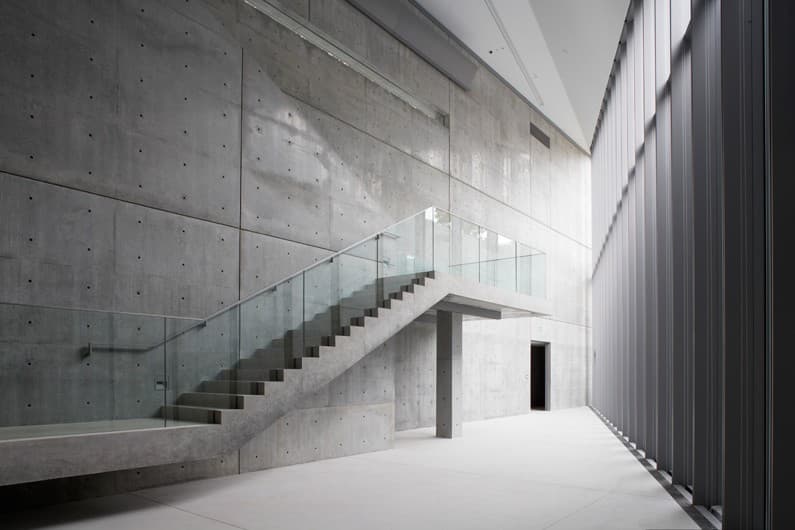
Resume for golden hour and blue hour—the 90 minutes before and after sunset. Position at key locations 60-90 minutes before golden hour begins. Concrete textures, west-facing facades, long dramatic shadows revealing structural details.
- Golden hour timing: 4-6pm depending on season (4pm winter, 6pm summer)
- Arrive early to scout angles and test compositions before peak light
- Blue hour lasts 20-30 minutes after sunset—calculate based on your positioning
Twilight Window
The 20-30 minute blue hour window after sunset. Tokyo's latitude compresses this transition. Sunset 4:45pm December means blue hour ends 5:15pm. Miss it and you're shooting full darkness. Your guide calculates timing so you're positioned and ready.
- This is the window that requires precision—late arrival means missing it entirely
- Common mistake: pack up after golden hour, miss blue hour completely
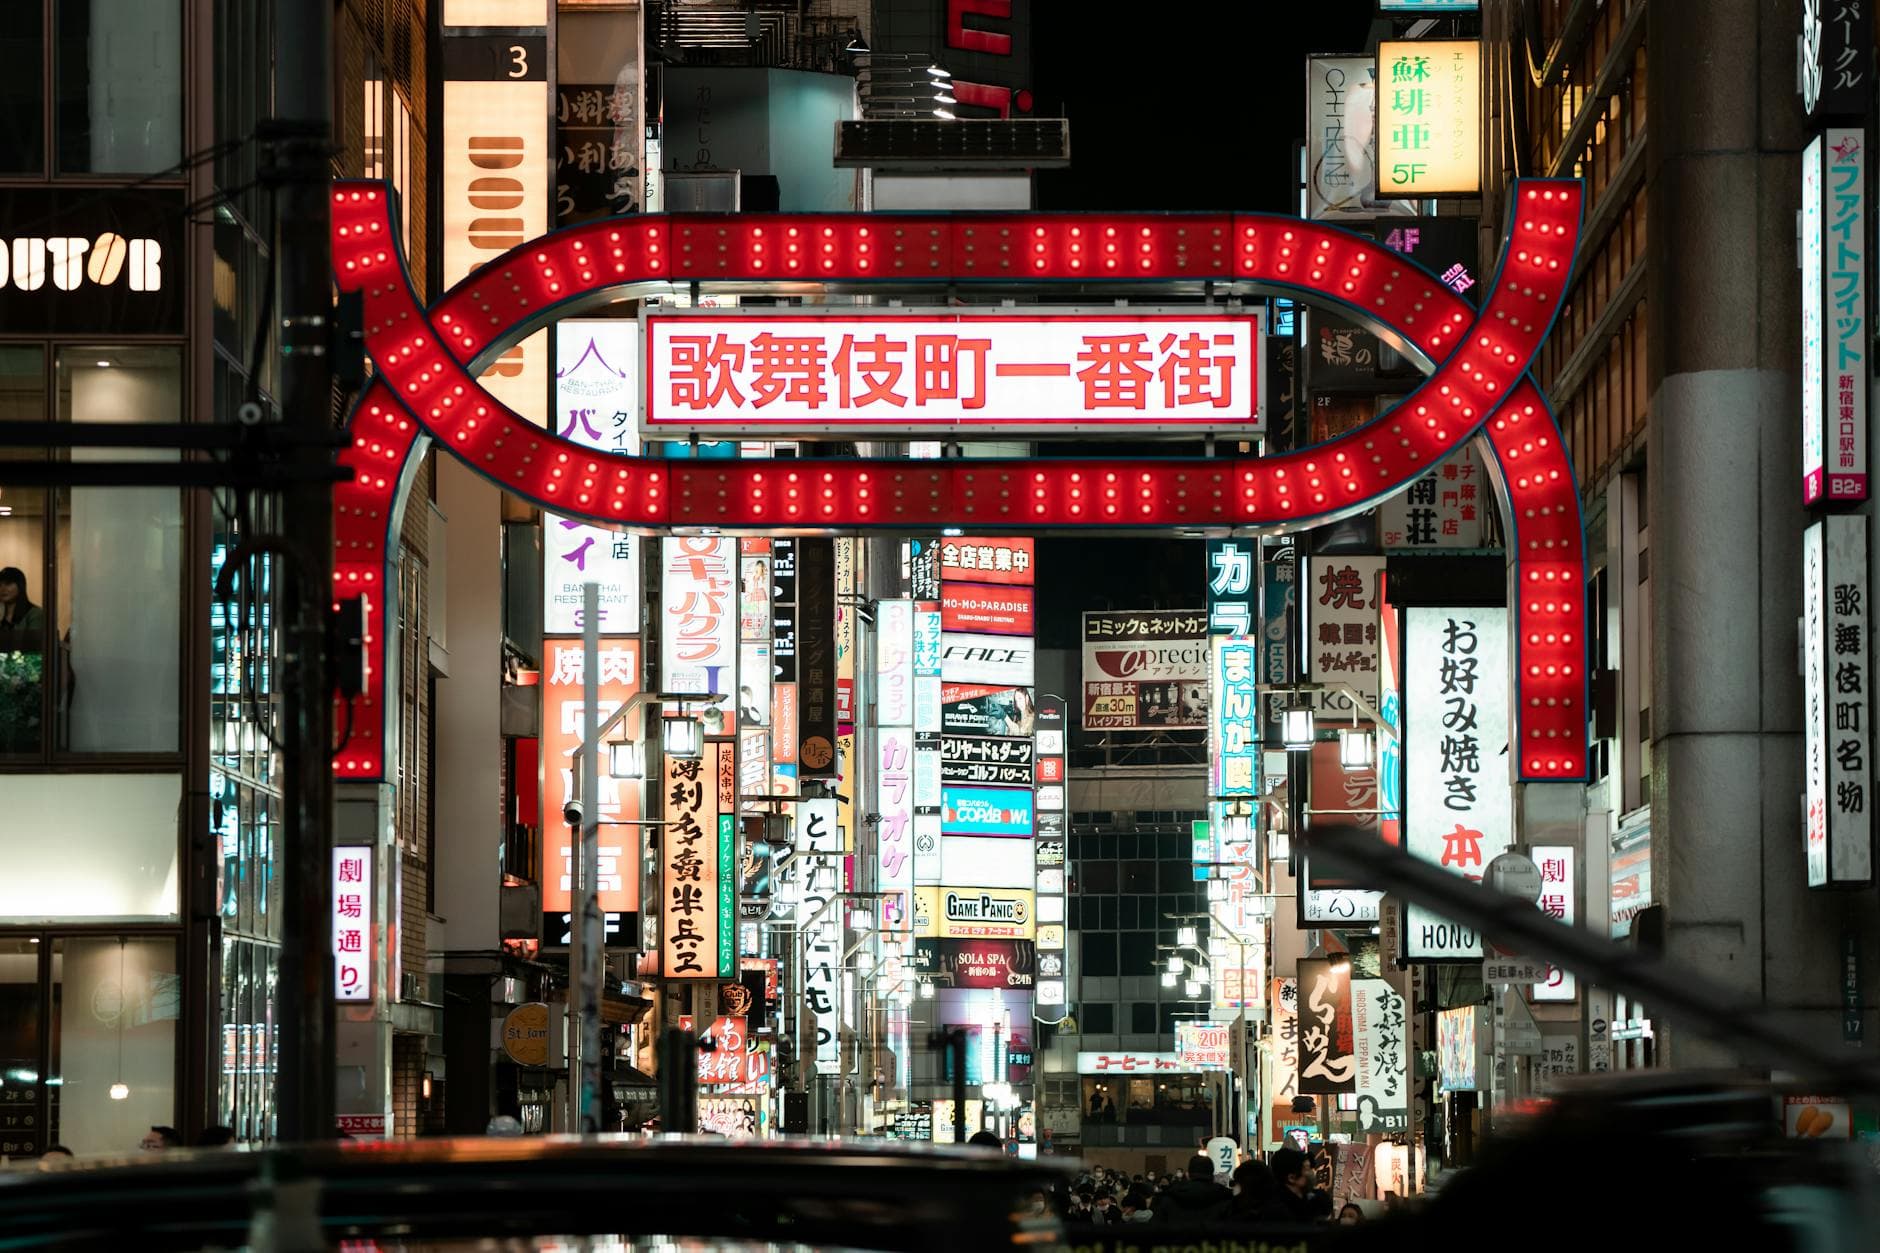
Neon & Long Exposure
Night photography at Kabukicho, Shinjuku, Shibuya—neon reaches peak intensity 8-10pm. Creative long exposures require tripods for 30-second to several-minute shots that blur crowds or create light trails. Guide knows current tripod policies and ground-level alternatives.
- Tripod alternatives: Yebisu Garden 38th floor allows them, Carrot Tower, Zojoji Temple grounds
- Tour wraps by 9-10pm after night session—full day built around light windows
This is merely a suggestion. Your itinerary is fully bespoke.
Your Private Experience Includes
NEON TOKYO
OLD MEETS NEW
BLUE HOUR