Navigate Tokyo’s rail maze with operator clarity, smart fare choices, and calmer transfers
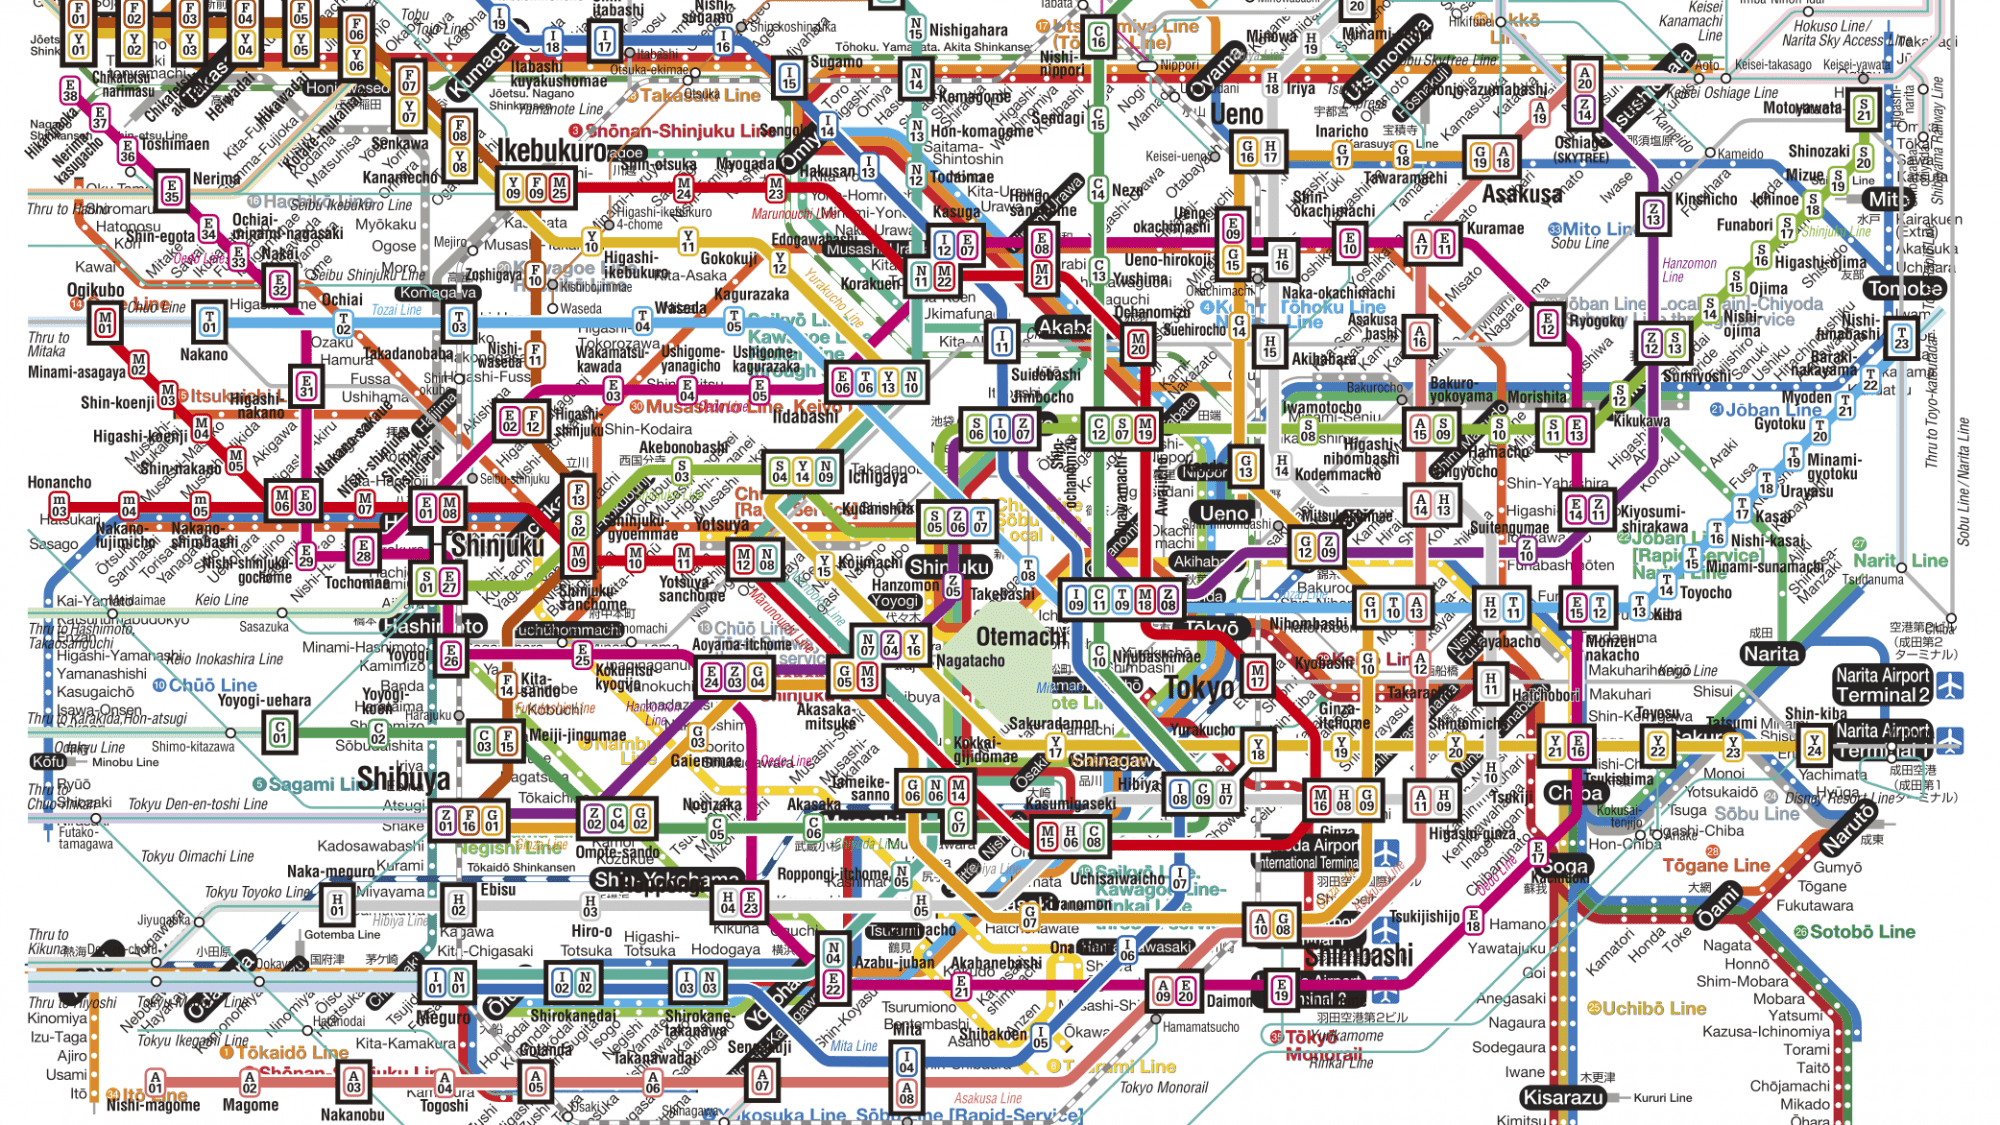
The Tokyo subway explained simply: it’s not one system but three separate operators whose lines all look the same to visitors. Navigate the rail maze with operator clarity, smart fare choices, and calmer transfers.
Tokyo’s subway isn’t one system—it's three separate operators running different lines that all look like "the subway" to visitors. This split creates real friction: transfers that cost extra, passes that don't work everywhere, and navigation that assumes you understand which company owns which platform.
The system works brilliantly once you know the distinctions. Before that, it's a source of missed connections, wrong exits, and wasted time.
System Structure: Metro, Toei, JR
Three separate operators run what visitors see as "the subway":
| Operator | Lines | Coverage | Type |
|---|---|---|---|
| Tokyo Metro | 9 lines | Most of central Tokyo | Underground subway |
| Toei Subway | 4 lines | Gaps Metro doesn't reach | Underground subway |
| JR East | Multiple (incl. Yamanote) | Circles city center, connects suburbs | Mix of above/underground |
All three use the same physical infrastructure—underground platforms, color-coded signs, IC card readers. But they're separate companies with separate fare zones.
For a detailed breakdown of how JR, Tokyo Metro, Toei, and private railways differ—and which passes work on which systems—see our complete operator comparison.
Why the operator split creates friction:
| Issue | Impact | Solution |
|---|---|---|
| Transfers between operators cost extra | Metro to Toei means exiting gates and re-entering = 2 separate trip charges | IC cards (Suica/Pasmo) calculate splits automatically |
| Day passes are operator-specific | Tokyo Metro-only pass won't work on Toei lines without combined version | Buy combined pass or use IC card for flexibility |
| Maps can be misleading | Routes cross multiple fare boundaries without making it obvious | Check which operators your route uses before traveling |
The distinction is invisible until you're standing at a gate that won't let you through, or you realize your "unlimited" pass doesn't cover the line you need.
Real scenario: You're staying near Roppongi (Tokyo Metro Hibiya Line). You want to reach Ryogoku for sumo (Toei Oedo Line). The map shows one transfer at Tsukiji. What it doesn't show: you'll pay separately for Metro and Toei portions, and transferring means leaving one system and entering another through different gates.
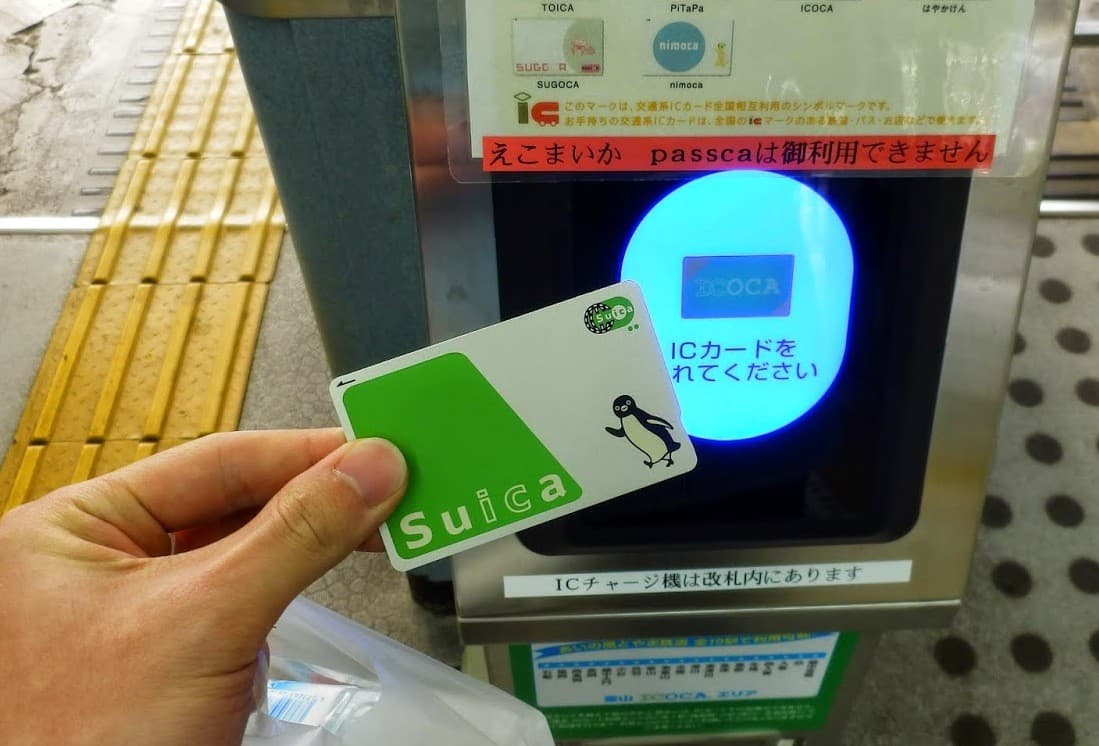
Suica and Pasmo IC cards eliminate most of this friction—they work on all three operators and calculate the split automatically. But understanding the structure prevents surprises when you're deciding between passes or planning routes.
The Lines That Actually Matter for Tourists
Tokyo has 9 Metro lines, 4 Toei lines, and multiple JR lines. You'll realistically use five of them for 90% of tourist movement.
| Line | Color | Coverage | Why It Matters |
|---|---|---|---|
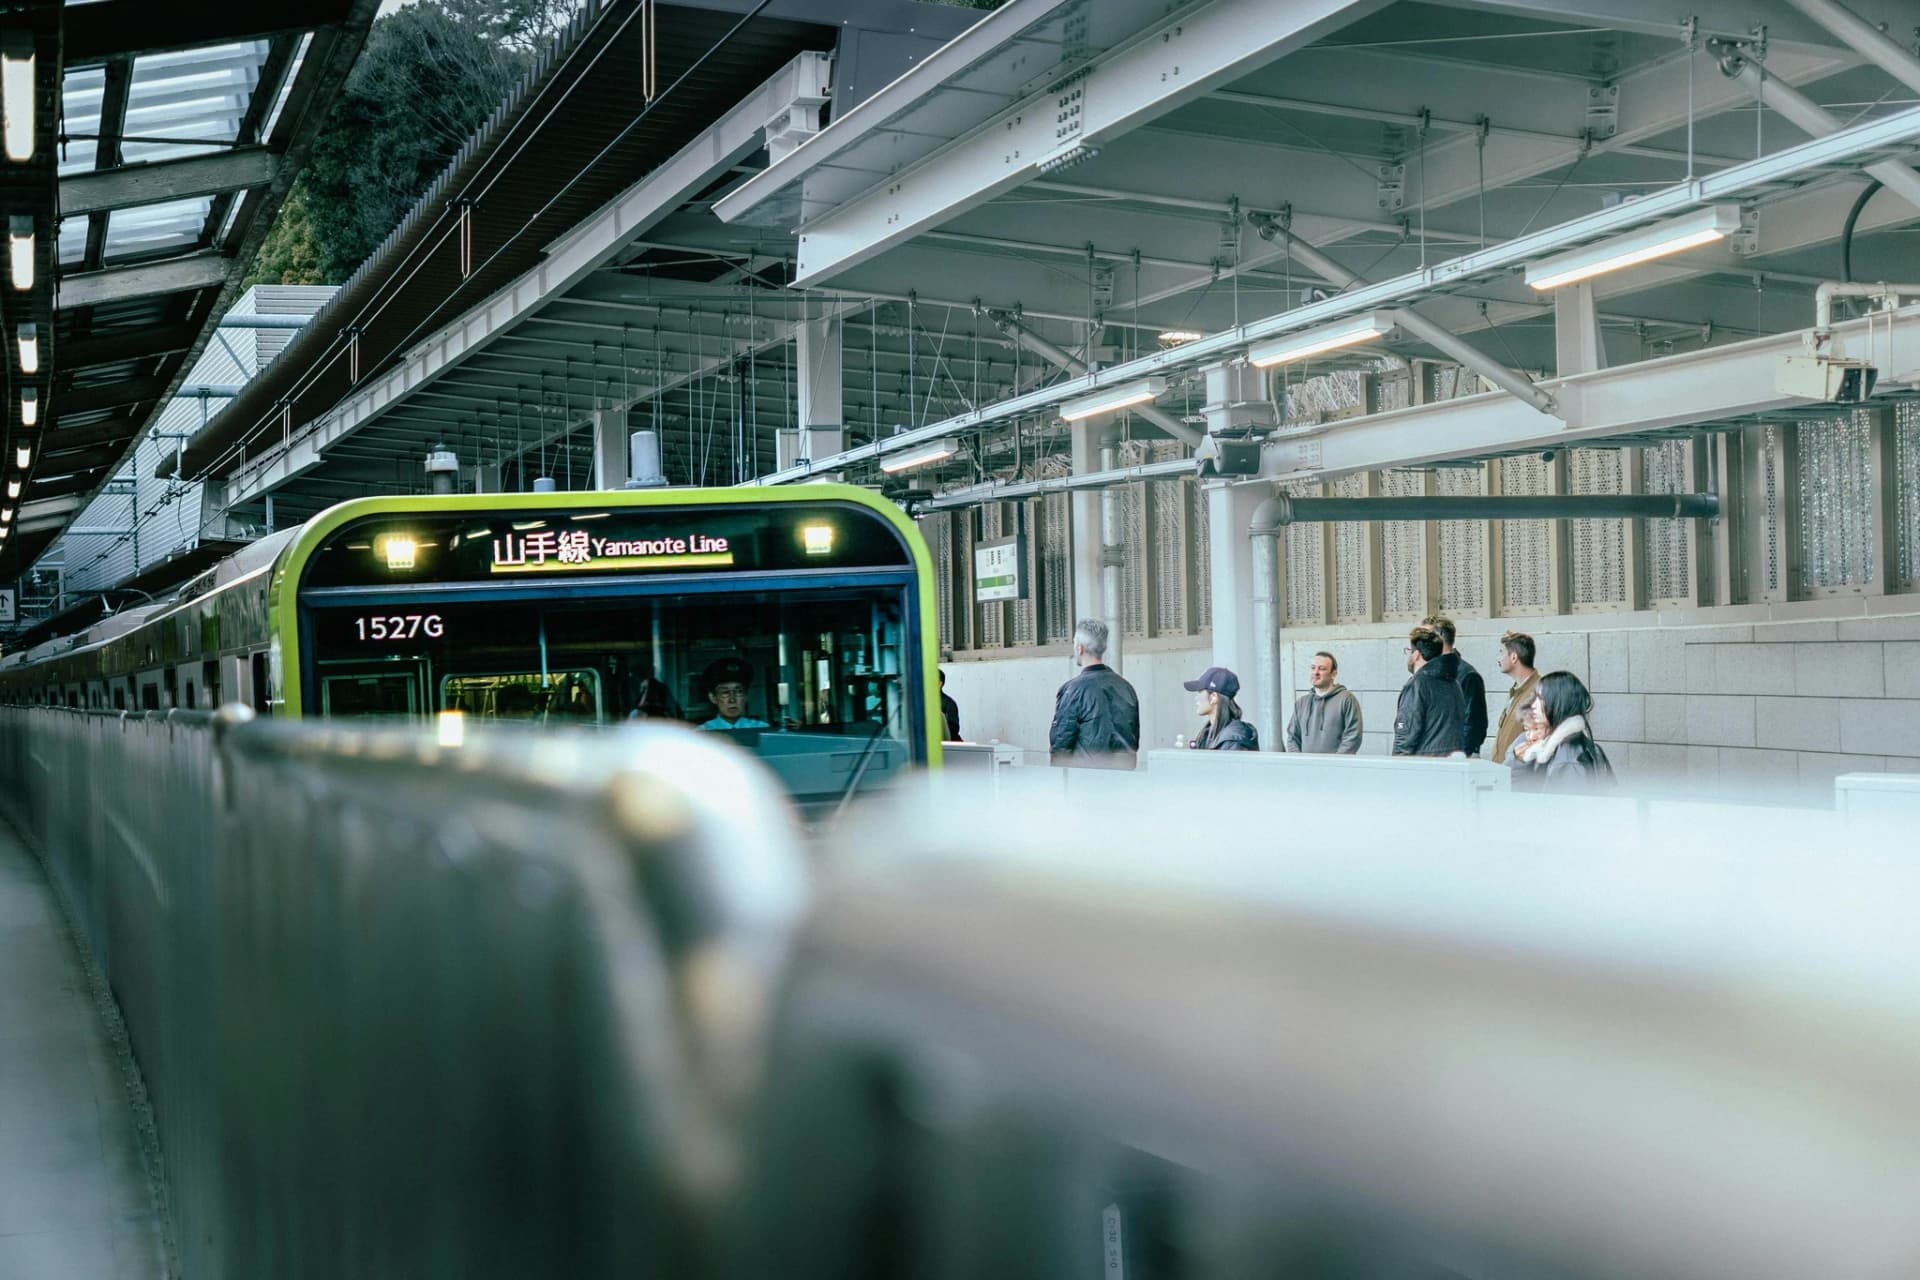
| JR Yamanote | Green | Loops around central Tokyo: Shinjuku, Shibuya, Tokyo Station, Ueno, Ikebukuro | Above ground, runs both directions. Most tourists use daily |
| Tokyo Metro Ginza | Orange | Asakusa to Shibuya via Ueno, Akihabara, Ginza | Oldest subway, covers tourist-heavy neighborhoods, frequent service |
| Tokyo Metro Hibiya | Silver | North-south: Ueno to Roppongi to Ebisu | Connects residential areas to nightlife zones |
| Tokyo Metro Marunouchi | Red | Horseshoe through city center: Tokyo Station to Shinjuku via Ginza | Parallels Yamanote but underground |
| Toei Oedo | Magenta | Massive loop: Shinjuku, Roppongi, Tsukiji, Ryogoku | Reaches places Yamanote misses, but platforms are deepest |
Lines you might never touch:
-
Tokyo Metro Tozai Line (light blue) runs east-west through business districts
-
Tokyo Metro Chiyoda Line (green) connects suburbs to the center but overlaps with other options
-
Toei Mita Line, Asakusa Line, Shinjuku Line serve specific corridors but aren't on most tourist routes
The decision framework: if your itinerary focuses on Shinjuku, Shibuya, Asakusa, Ginza, Roppongi, and Ueno, the five lines above cover everything. For more on which neighborhoods each line connects, see our neighborhood guide. If you're staying in outer neighborhoods or visiting specific museums, you might need one of the secondary lines occasionally.
IC Cards vs Day Passes: The Decision Tree
Suica and Pasmo are rechargeable IC cards that work on all trains and subways in Tokyo. Both cost ¥500 deposit (refundable) plus whatever credit you load. They're functionally identical—Suica is issued by JR, Pasmo by private railways, but both work everywhere.
When to use IC cards:
-
Most trips. They're faster than buying tickets, work on buses, and calculate complex fares automatically.
-
You can refund unused balance when leaving (minus ¥220 handling fee).
Tokyo Subway Tickets are unlimited-ride passes valid on Tokyo Metro and Toei Subway only (not JR):
| Duration | Adult Price | Child Price |
|---|---|---|
| 24 hours | ¥800 | ¥400 |
| 48 hours | ¥1,200 | ¥600 |
| 72 hours | ¥1,500 | ¥750 |
IC Cards vs Tokyo Subway Tickets — Decision comparison:
| Factor | IC Card (Suica/Pasmo) | Tokyo Subway Ticket |
|---|---|---|
| Coverage | All operators (Metro, Toei, JR, buses) | Metro + Toei only (no JR) |
| Cost model | Pay per ride (¥180-330) | Unlimited rides during validity |
| Flexibility | Use anywhere, anytime | Limited to 24/48/72 hour window |
| Best for | Mixed itineraries, 4-5 rides/day, using JR | 6+ Metro/Toei rides daily, concentrated sightseeing |
| Setup | ¥500 deposit (refundable -¥220 fee) | Purchase at airport/Metro stations |
| Break-even | N/A (pay-as-go) | 5 rides at ¥180, or 3 rides at ¥300 |
When a pass makes sense:
-
Staying multiple days and visiting 8+ attractions daily that cluster around Metro/Toei stations
-
Accommodation is on a Metro line and you rarely need JR
-
Concentrated sightseeing blitz (Asakusa, Ueno, Akihabara, Ginza, Tsukiji in one day)
When it doesn't:
-
Hotel is near a JR station (passes don't cover JR)
-
Taking taxis or walking between neighborhoods
-
Visiting 2-3 major sites per day rather than rapid-fire touring
-
You value flexibility to use JR when more convenient
The IC card is the default choice for most visitors. Passes are an optimization for specific itinerary patterns, not a universal recommendation. If you're still deciding where to stay based on subway access, proximity to your most-used lines matters more than pass compatibility.
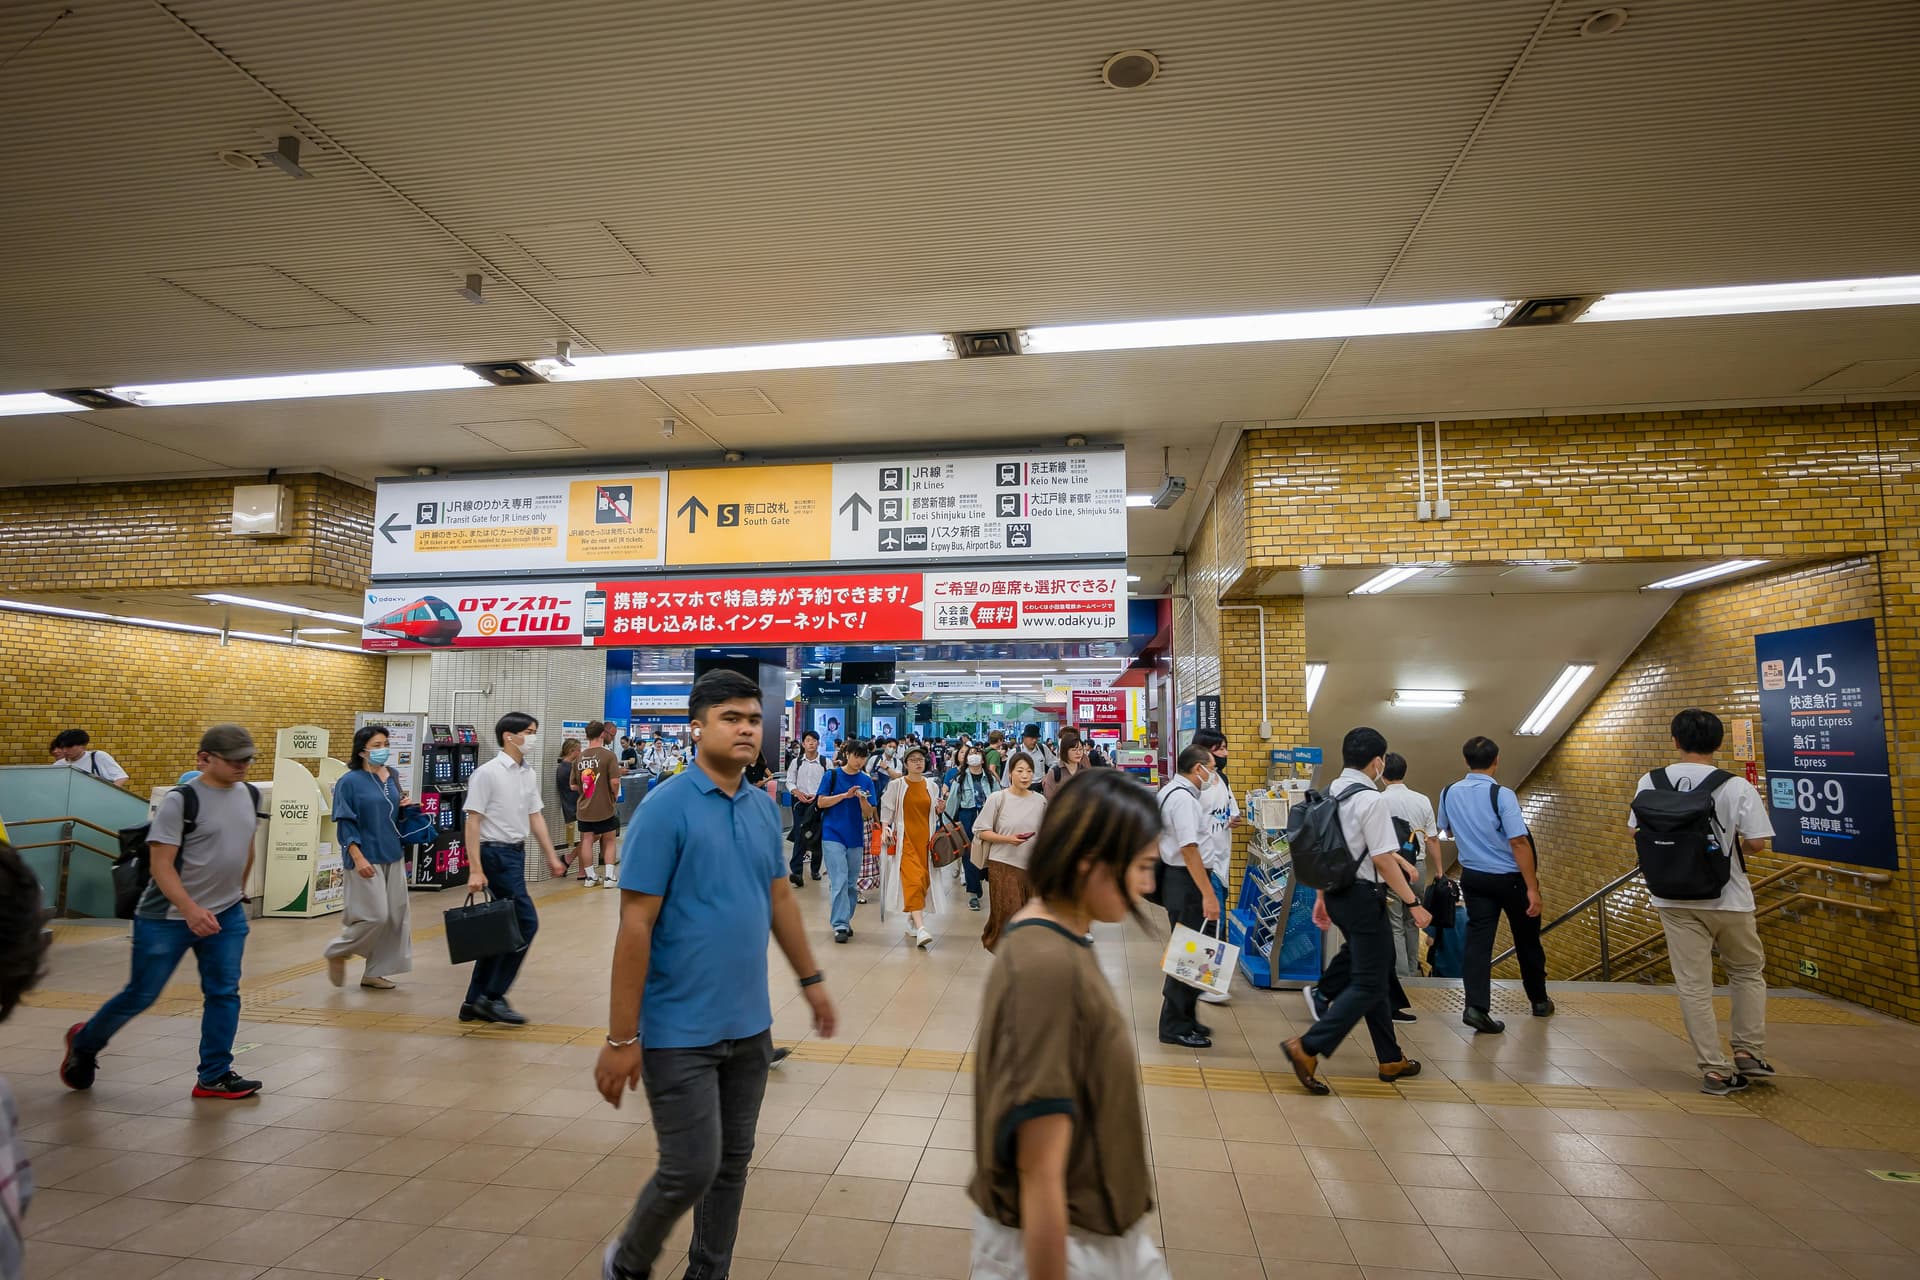
Transfer Mechanics: How Stations Actually Connect
Tokyo's transfer stations aren't platforms across from each other. They're multi-level complexes where "transferring" means navigating underground shopping streets, long corridors, and multiple escalators between lines that might be 5-10 minutes apart on foot.
Why transfers take longer than expected:
| Complexity Type | Description | Example |
|---|---|---|
| Vertical | Deep platforms require multiple escalators | Toei Oedo 40+ meters underground. Ginza to Oedo at Shinjuku: 12-15 min |
| Horizontal | Long walking distances between fare zones | JR Shinjuku to Toei Oedo platform: 200+ meters through passages |
| Gate confusion | Metro ↔ Toei requires exiting one system, entering another | Never surface but must tap out/in, adding time and cost |
Specific transfer examples:
| Transfer Route | Time | Navigation Notes |
|---|---|---|
| Shinjuku: JR to Toei Oedo | 10-15 min | Follow yellow JR signs to west exit area, then descend to Oedo platforms. Budget extra time for first attempts |
| Shibuya: JR Yamanote to Ginza Line | 5-8 min | Lines on different levels but relatively direct. Peak hours add congestion |
| Tokyo Station: Marunouchi to JR | 5-7 min | Enormous but well-signed. Stay alert—there are 10 JR platforms |
The mental model: Think of transfers as traveling between connected buildings, not just changing platforms. Signs will guide you, but the physical distance is real.
When you pay twice: Transferring between Tokyo Metro and Toei requires tapping out of one system and into the other. Suica handles this automatically, but you'll see two separate charges. Metro-to-Metro or Toei-to-Toei transfers stay within the same fare zone.
Minimizing transfer complexity:
| Strategy | Benefit |
|---|---|
| Check Google Maps transfer times before committing | Reveals which routes have 15+ min transfers |
| Budget 10 min minimum for unfamiliar transfers at major hubs | Prevents missed connections |
| Follow color-coded line signs religiously | More reliable than station name kanji |
| Don't panic if you miss a train | Next train arrives in 3-5 minutes during daytime |
The Stations Where Most Visitors Get Lost
Three stations cause 90% of tourist confusion:
| Station | Complexity | Key Challenge | Best Exit Strategy |
|---|---|---|---|
| Shinjuku | World's busiest. 50+ exits across multiple buildings | Multiple disconnected exit areas (East/West/South), no dominant entrance | Know your line before arrival. East Exit → Kabukicho; West Exit → Government Building; South Exit → Takashimaya. Budget 20 min first time |
| Tokyo Station | 10 JR platforms, Shinkansen, Metro | Marunouchi (west) and Yaesu (east) sides structurally separate | Know which side you need. Shinkansen transfers need extra time. Specify exact gate when meeting people |
| Shibuya | Platforms spread across 5+ levels | Lines occupy different elevations, ongoing renovation | Use Google Maps exit-by-exit. Hachiko exit crowded but reliable. Expect stairs for Ginza Line |
General principle: These stations evolved over decades to handle volume, prioritizing flow over clarity. Getting lost once is the cost of learning. This is why many visitors arrange meet-and-greet services for arrival day—guides eliminate navigation stress while you're still jet-lagged. For more on common subway mistakes visitors make, we cover the most frequent navigation errors.
Station complexity reflects how Tokyo developed—multiple private rail companies built competing hubs, each becoming a mini-downtown. The how Tokyo works guide explains this polycentric structure, which helps the station chaos make sense (even if it doesn't make it easier).
Platform and Direction Logic
Tokyo uses a color-coded signage system. Each line has a color and letter code. Ginza Line is orange (G). Yamanote Line is green (JY). Signs show both the line color and the station codes along that line.
Finding your platform and boarding correctly:
| Step | Action | Why It Matters |
|---|---|---|
| 1. Identify line color | Check map for your line's color (orange, green, red, etc.) | Color is faster to follow than reading kanji |
| 2. Follow color signs | Track colored signs through the station | Works even without Japanese literacy |
| 3. Check platform destination | Verify destination names before boarding | Trains on same platform may terminate early |
| 4. Verify the 終 symbol | 終 = last stop | Train terminates there, doesn't continue full route |
| 5. Confirm platform side | Check electronic board for departing train's final destination | Wrong platform = opposite direction |
Direction navigation and recovery:
| Situation | How It Works | What To Do |
|---|---|---|
| Direction signs | Show terminal stations, not compass directions | Learn terminal names: "Shibuya/Shinjuku direction" not "clockwise" |
| Loop lines (Yamanote, Oedo) | Trains go both ways to reach same destinations | Check platform's destination list—if your stop is listed, board |
| Wrong train boarded | Lines are bidirectional | Get off next station, cross to opposite platform, return. IC cards make re-entry seamless |
| Uncertain which train | Trains every 3-5 min during day | Stand behind yellow line, let one pass, verify next train's destination |
| Crowded station | Japanese announcements + kanji signs | Follow color signs—orange to Ginza Line is clearer than parsing station names |
Rush Hour, Luggage, and Physical Realities
| Period | Time | Intensity | What It Means |
|---|---|---|---|
| Morning rush | 7:30-9:30 AM (peak 8-9 AM) | Severe | Platform crowding, 150-180% train capacity, physical contact unavoidable |
| Evening rush | 5:30-7:30 PM | Moderate | More dispersed, still crowded but less compressed than morning |
With luggage: Morning rush hour at major hubs like Shinjuku is actively unsafe with a large suitcase. The crowds compress and surge. You can't control your movement. Your bag becomes a blocking hazard.
The alternative: store bags before navigating rush-hour trains. Tokyo's luggage storage options cover lockers, app-based services, and forwarding—knowing what's available prevents the "dragging a suitcase through Shinjuku at 8am" scenario.
Where this matters most:
-
Arriving at Narita/Haneda during morning hours and transferring to reach your hotel
-
Checking out with luggage during evening rush
-
Any multi-station trip with transfers during peak times
Elevator reality: Most stations have escalators and stairs. Elevators exist but are rare, often located away from main flow, and not always marked clearly on maps. Assume stairs. If you need elevator access, research specific station layouts in advance. For guests with mobility needs, private car tours remove the elevator search entirely—you never enter a station.
Alternative: luggage forwarding services
Yamato Transport (Takkyubin) and other services will pick up luggage from airports or hotels and deliver to your next destination by the next day.
| Service Aspect | Details |
|---|---|
| Cost | ¥1,500-3,000 depending on distance and size |
| Drop-off | 7-Eleven, FamilyMart, hotel front desks |
| Delivery time | Next day for most routes within Japan |
| Benefit | Removes luggage problem entirely |
When to use alternatives vs when the subway still works:
| Scenario | Subway Works | Use Alternatives |
|---|---|---|
| Timing | Off-peak (after 9:30 AM, before 5 PM) | Rush hour with luggage or tight schedules |
| Luggage | Small bags, backpacks | Large suitcases, multiple bags |
| Group size | Solo or pairs | Families, groups of 4+ |
| Mobility | No constraints, comfortable with stairs | Seniors, strollers, accessibility needs |
| Route | Direct, minimal transfers | Multiple transfers at major hubs |
Rush hour isn't a permanent barrier—it's a 2-hour window. Plan around it when possible. When you can't, luggage forwarding is the norm here, not an edge case.
When the Subway System Works Against You
The subway is efficient, cheap, and comprehensive. It's also a constant stream of micro-decisions that accumulate over days: which exit, which platform, which line, which transfer route.
Scenarios where complexity overwhelms the benefits:
| Situation | Challenge | Impact |
|---|---|---|
| Jet-lagged arrival with luggage | 9 AM rush + Shinjuku transfer + 2 more connections | Each decision point compounds fatigue. Wrong exit = 20-30 min lost |
| Mobility limitations | Seniors, strollers, stairs | Elevator routes exist but need pre-planning. Default assumes stair capability |
| Large groups/families | Keeping 4-6 people together through transfers | Someone always lags. Regrouping wastes time |
| Multi-day fatigue | Day 3+ of constant navigation | No autopilot mode. Mental load affects trip enjoyment |
| Time-sensitive connections | Flights, reservations, meetings | One wrong exit creates cascading delays |
When alternative transport makes sense:
Not because the subway is bad. Because removing navigation decisions entirely changes the experience. Private cars eliminate transfers, platform confusion, luggage management, and crowd navigation. Taxis work for direct routes. Luggage forwarding solves the baggage problem.
The subway handles volume brilliantly. What it doesn't do is reduce cognitive overhead for people unfamiliar with the system. After 3-4 days, most visitors have internalized the key routes and stations. Before that threshold, every trip is active problem-solving.
This isn't a warning to avoid the subway. It's recognition that "manageable" and "enjoyable" aren't the same state. Some visitors reach day three and realize they've spent more energy navigating than experiencing Tokyo. For more on when navigation overhead outweighs subway benefits, we break down the decision factors.
If you want your first day to run without transfer stress, start with Tokyo Essentials or compare private tour options by travel style before you finalize transit-heavy plans.
This guide is published by Hinomaru One, a Tokyo-based private tour operator.